Which is recommended for snorkeling: high tide or low tide?
A thorough explanation of recommended times and the rise and fall of tides!
When joining a snorkeling tour, you probably often search online for tour companies.
There are many companies and various time slots from morning to evening.
It can be difficult to decide which company to choose and which time is best.
The conclusion about the best snorkeling time is that it depends on the person.
Generally,
Advanced participants → high tide
Beginners → low tide
is the usual advice.
However, it also changes depending on whether you enter from the beach or a boat.
Both high and low tide have advantages and disadvantages.
Reading this article will help you understand the best snorkeling time for different participants.
We also explain in detail the rise and fall of tides, which you should know about before snorkeling.
Deepen your knowledge of the sea and enjoy snorkeling more safely and happily.
Which is recommended for snorkeling: high tide or low tide?
‘When researching snorkeling, I often see terms such as high tide and low tide, but I only learned about them in elementary school and do not know much about them.’
‘Which is actually recommended for snorkeling, high tide or low tide?’
Have you ever wondered about this?
Many people probably know that the sea has rising and falling tides.
What exactly is this rise and fall of tides?
We explain its relationship with snorkeling in detail.
What are high tide and low tide?
Knowledge of high and low tide is very important for snorkeling.
Without it, you might arrive at the beach ready to swim only to find the sea has receded!
First, learn about high and low tide.
High and low tide basics
High tide:the sea surface at its highest level
•Low tide: the sea surface at its lowest level
These two phenomena form part of the natural phenomenon of tides, commonly called the rise and fall of the tide.
They are mainly caused by the gravitational pull of the moon and sun.
How tides work
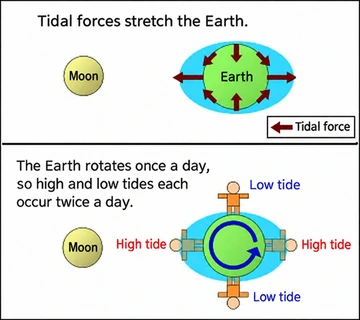
Tides result from a combination of the moon's gravity, Earth's rotation, and inertial forces from the mutual motion of Earth and the moon.
Specifically, the following processes are involved.
The moon's gravity: The moon's gravitational pull on Earth draws up seawater near the moon, producing high tide.
Centrifugal force: Centrifugal force generated as Earth revolves around the moon also has an effect, causing high tide on the side opposite the moon.
High tide therefore occurs on both the side where the moon's pull is stronger and where it is weaker, with low tide between them.
Source: Japan Meteorological Agency
The cycle of high and low tide
Generally, high and low tide each occur 2 times in 1 day.
This is because Earth's rotation makes seawater affected by the moon's gravity rise and fall periodically.
Specifically, the interval from one low tide to the next is approximately 12 hours 25 minutes.
High and low tide times therefore become approximately 50 minutes later each day.
Tidal range
The difference in water level between high and low tide is called tidal range.
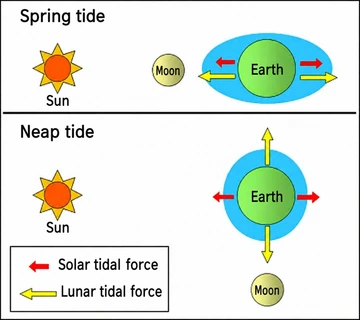
This tidal range changes according to the relative positions of the moon and sun.
Near the new moon and full moon, the tidal range increases; this is called spring tide.
Near the first and last quarter moon, the tidal range decreases; this is called neap tide.
The difference in water level between high and low tide is large at spring tide and small at neap tide.
Source: Japan Meteorological Agency
Types of tides
Tides are categorized as follows according to tidal range, the difference between high and low water levels.
- Spring tide: greatest range
- Intermediate tide: moderate range
- Neap tide: small range
- Nagashio: smallest range
- Wakashio: the transition from nagashio to intermediate tide
These repeat in an approximately 2-week cycle.
Regional differences
The size of tides and tidal range differ by region.
For example, Japan's Pacific coast has a difference between high and low tide of around 2 meters, while on the Sea of Japan side it is smaller, around 40 centimeters.
Worldwide, a tidal range of up to 15 meters is sometimes observed in Canada's Bay of Fundy.
Just imagining a place that is land in the morning becoming sea 15m deep by midday is amazing.
Check high and low tide times!
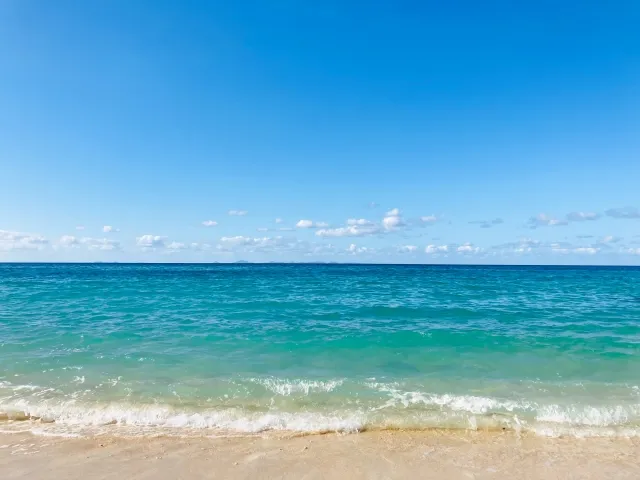
How can you check these high and low tide times that differ by region?
A tide chart makes it easy.
What is a tide chart?
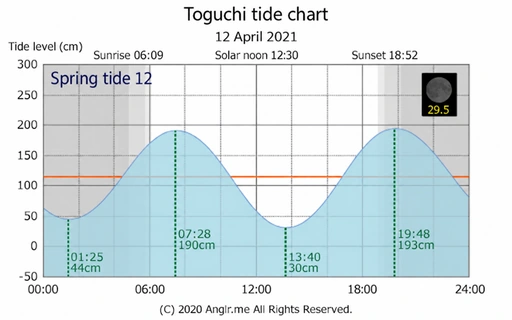
A tide chart is also called a tide graph.
It visually represents changes in tides—the periodic rise and fall of sea level caused by the sun's and moon's gravity—showing them along a time axis.
Tide charts mainly provide the following information.
- High and low tide times
- Sea surface height in cm
- The pattern of tidal changes over a day
How to read a tide chart
- The graph's vertical axis is tide level in cm and the horizontal axis is time
- Peaks in the curve are high tide and valleys are low tide
- Steeper slopes mean faster tidal movement
Source: Motobu Town, Kunigami District, Okinawa Prefecture
Things to consider with tide charts
Sea surface height is shown in cm, but it is the water level measured from a reference datum, rather than from land.
The reference datum is the water surface used as a standard for measuring tide levels: the lowest water level, beyond which the water level does not rise further.
In some places, land appears at 0cm, while other places have a water level of 50cm.
Even if you go expecting 1m of water because the chart says 100cm, a location with a reference datum of 50cm will have a water level of 150cm.
Particular care is needed when playing on a beach with small children. Even if you go expecting shallow water, a high reference water level may make it deeper than expected and unsuitable for playing.
For beach entry, snorkeling is possible with a water level of 100cm.
Using a 100cm water level as a guide when deciding your snorkeling time is a good idea.
Useful tools
Using the internet or smartphone apps lets you check weather, wind speed, wave height, and other information alongside tide graphs.
This helps you plan safer and more comfortable snorkeling.
Understanding and using tide charts makes snorkeling more enjoyable.
Always put safety first and pay attention to changes in nature while making wonderful memories.
Below are useful websites and apps for checking tide charts helpful for snorkeling.
This smartphone app provides detailed tidal information nationwide and displays moon age and tidal current data clearly.
Its design is particularly easy for beginners to use and helps you understand tidal movement at snorkeling spots.
Nationwide tide charts and tide graphs
It provides tide charts and graphs for 4299 locations across Japan, with detailed information about fishing spots, swimming beaches, and shellfish gathering areas.
Information focuses on fishing, but it is entirely useful for snorkeling too.
This website lets you check tide charts throughout Okinawa and is particularly recommended if you are planning an Okinawa trip.
Tide graphs let you visually check rising and falling tides and water levels.
These apps are aimed at fishing but have many features extremely useful for snorkeling too.
They provide pinpoint tide charts for over 4,000 fishing spots and coastal locations nationwide.
Shiosai S is an app providing tidal information and more across Japan.
It strongly supports anglers with tidal information, weather, wind roses, moon information, weather warnings and advisories, and wave information.
A recommended feature is that you can check water levels in cm not just at high and low tide but at times between them too.
You can also use the calendar to check high and low tide times on your planned travel dates, making detailed travel plans easier.
It provides tide information and tide-chart calendars across Japan.
It shows tidal conditions and high and low tide times nationwide, with spring and neap tide information available alongside them.
You can also view sunrise, sunset, moonrise, moonset, moon age, and weather forecasts.
Those were our recommended websites and apps.
If installing an app feels troublesome, simply enter a tide-chart search in Google using 「潮見表」 followed by the location.
For snorkeling in Okinawa, entering a region, such as 「潮見表 恩納村」 for Onna Village or 「潮見表 那覇市」 for Naha, lets you view tide charts on the various websites.
Please make use of them.
How to use tide charts
Check low and high tide times
When snorkeling, low tide allows observation in shallow water, while high tide may make the water too deep. Checking charts ahead and choosing the best time is important.
Pay attention to tidal movement
Slack tide, when tidal movement stops, brings calmer seas and is suitable for snorkeling. Planning around this period is one strategy.
Use this information to plan more enjoyable snorkeling.
Explaining the best snorkeling times: advantages and disadvantages of high and low tide
We explain the advantages and disadvantages of high and low tide for snorkeling in detail.
Advantages and disadvantages of high tide
Advantages:
- Greater depth: Water is deeper at high tide, potentially allowing exploration of a wider area, particularly where coral reefs and fish are abundant. This enriches the snorkeling experience.
- Currents are often calmer: Currents are often relatively calm at high tide, allowing even beginners to enjoy themselves with peace of mind.
Disadvantages:
- More places where you cannot touch the bottom: Deeper water means more places where your feet do not reach, which may cause anxiety particularly for beginners and children.
- Currents may become faster: Currents can become faster at high tide, requiring particular care as the tide turns. There is a risk of being swept away, so going with experienced people is recommended.
Advantages and disadvantages of low tide
Advantages:
- Shallower water: Shallower water at low tide brings you closer to coral and fish, making observation easier. It offers reassurance particularly for small children and beginners.
- Calm sea conditions: Waves are often calmer at low tide, making suitable snorkeling conditions more likely. Particularly recommended for families and older adults.
Disadvantages:
- Swimming may be difficult: Shallower water may make swimming feel difficult. Rocks and coral may also be exposed at low tide, requiring attention to your footing.
- Observation areas may be limited: Shallower water can restrict the area you can explore. Large fish and creatures living in deeper places become particularly difficult to observe.
When enjoying snorkeling, understand the characteristics of high and low tide and choose the best time according to your skills and purpose.
Low tide often suits beginners and families, while experienced participants can enjoy wider exploration at high tide.
For safe enjoyment, pay attention to tidal changes and currents and check information ahead using tide charts or similar resources.
Next, we explain high and low tide advantages and disadvantages for each entry method: boat and beach entry.
Boat entry
High tide advantages:
At high tide, greater depth often allows observation of many creatures at open-sea locations. Particularly at spots with large fish such as manta rays, visibility may be better at high tide.
The surface is often calmer and less affected by waves.
High tide disadvantages:
Currents may become strong at high tide; rip currents occur easily particularly around southern islands, requiring care.
Note: A rip current is a strong seaward current occurring along the coast.
Low tide advantages:
With boat entry, water remains deep enough even at low tide, so observation is no problem. In particular, water is often clear at low tide and visibility may be high.
Low tide disadvantages:
Water may become shallow at certain spots at low tide, requiring care. Exposed coral reefs in particular may affect boat navigation.
Beach entry
High tide advantages:
Deeper water at high tide may make coral and fish harder to see, but creates an environment where even beginners can swim with peace of mind.
High tide disadvantages:
Greater depth increases the distance to coral and fish, sometimes making observation difficult. Footing also becomes harder to see, which may concern beginners.
Low tide advantages:
Shallower water often allows close observation of coral and fish, making it particularly suitable for children and beginners. Many places let you touch the bottom, offering reassurance.
You can also observe creatures in tide pools, offering enjoyment beyond snorkeling.
Low tide disadvantages:
Extremely shallow water may create areas where swimming is impossible, and longer walking distances may be required particularly at low tide.
Conclusion
- For beginners and families, we recommend beach entry at low tide. Shallow water and proximity to fish allow enjoyable participation with peace of mind.
- For experienced participants or people wanting to observe particular creatures,boat entry at high tide is suitable. Open-sea locations in particular have diverse creatures, promising a more fulfilling experience.
Choosing the best timing according to each situation is important.
We recommend checking tidal conditions ahead using tide charts and making a plan.
Join a snorkeling tour
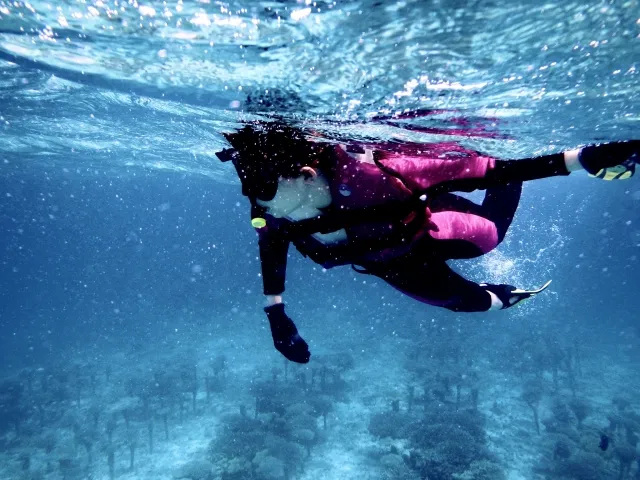
We recommend joining a tour when snorkeling.
A professional guide provides careful support, allowing even beginners to participate with peace of mind.
Tours also teach you about hidden scenic locations and marine creatures' secrets, so special experiences unavailable in everyday life await.
Why not enjoy moving moments created by nature with family and friends?
A snorkeling tour, refreshing you away from everyday life while you feel pleasant sea breezes, is a chance to make wonderful memories.
Join a tour while traveling and experience the sea's appeal with your whole body!
‘There are so many tour companies that I do not know which to choose.’
Rest assured. We explain how to choose a tour company in detail.
9 tips for choosing a snorkeling tour company!
When choosing a snorkeling tour company, checking several points is important to ensure safety and experience quality.
The following explains selection tips in detail.
Attention to safety
- Licenses and qualifications
Check whether the company has official licenses or certification. Certification by diving organizations such as PADI or NAUI is particularly reliable. - Guide experience and qualifications
Check whether guides have appropriate training and lifesaving qualifications such as CPR and first aid. - Safety equipment availability
Check whether equipment such as life jackets and flotation aids is provided and inspected regularly.
Tour content and destinations
- Course details
Check whether the course matches your level and preferences, such as beginner-friendly, family-friendly, or active adventures. If you have small children, check the minimum participation age. - Participant count
Check how many participants join and whether you are mixed with others. Small-group tours offer more individual support and are particularly recommended for beginners. - Destination characteristics
Research whether spots such as fish-rich areas or beautiful coral reefs meet your expectations. - Environmental consideration
A tour that considers coral reef protection and ecosystems is important.
Check reviews and feedback
- Online reputation
Check Google reviews and travel review websites for other participants' experiences. - Actual experiences
Look for specific feedback about safety, guide service, and facility cleanliness.
Prices and service contents
- Reasonable pricing
Carefully check services included in the tour price. Even a cheap tour can become expensive overall if rental charges apply. Also,a price far lower than competitors may indicate problems with service contents or safety. Check carefully. - Included services
Check for rental equipment such as snorkels, masks, and fins, transport, and photography services. For photography in particular, carefully check whether it is paid or free and whether photo counts are limited. Comprehensive optional services, such as fish feeding and mermaid photography, are also important.
Cancellation policy
- Flexibility
Check whether refunds or rescheduling are offered for cancellation due to worsening weather or similar reasons.
Support for beginners
- Beginner instruction availability
Tours offering basic snorkeling instruction are recommended for first-timers or people unaccustomed to water. - Guide support system
Check for underwater support and whether a guide stays nearby to assist.
Quality of equipment and boats
- Equipment condition
Check that rental equipment is clean and in good condition. - Boat facilities
Showers, toilets, and a comfortable environment are also points to check.
Insurance availability
Also check whether insurance is included in the tour. We recommend a plan including insurance to prepare for unexpected accidents.
Entry methods
Snorkeling offers beach entry and boat entry.
Choosing an entry method suited to your skills and preferences is important.
Beach entry often suits beginners, while boat entry provides convenient access and lets you visit more locations.
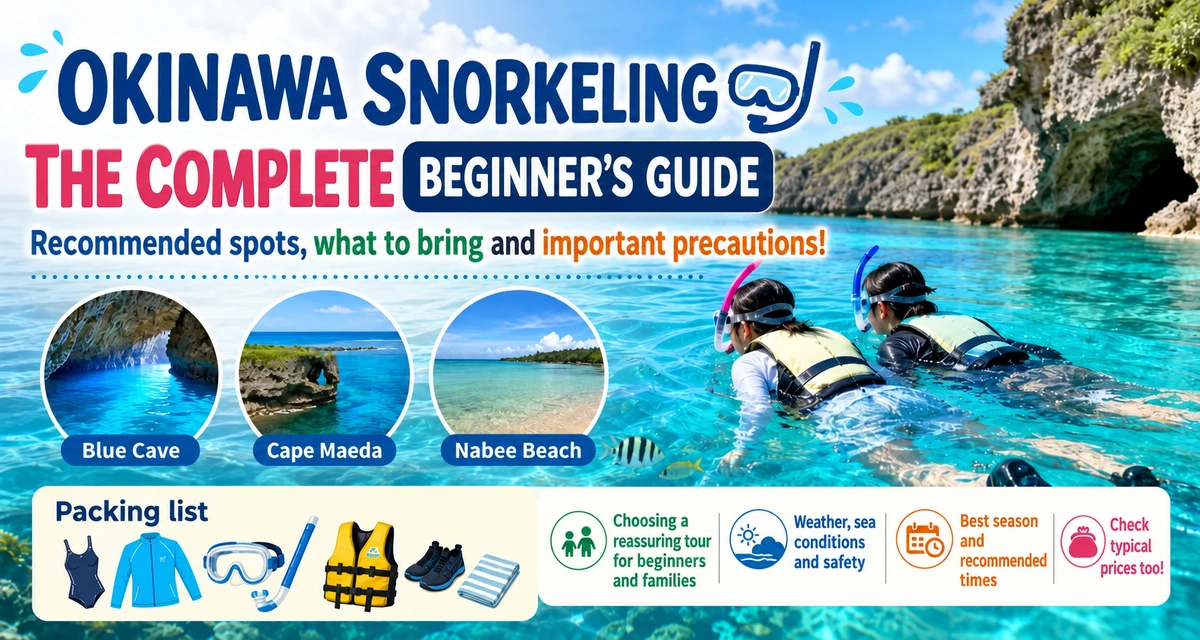
Recommended snorkeling spots on Okinawa's main island
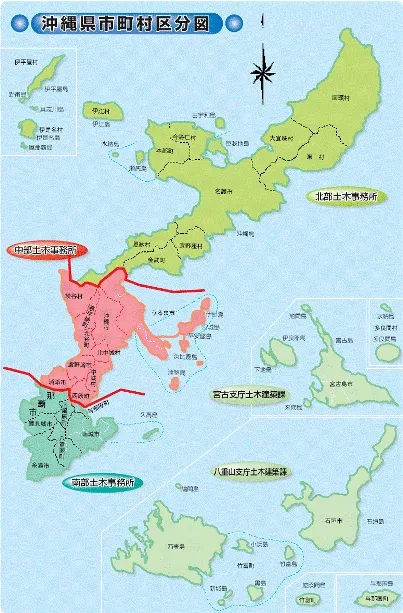
Many people probably go snorkeling during an Okinawa trip.
Okinawa's main island has many wonderful snorkeling spots with beautiful coral reefs and abundant marine life.
Here are recommended spots by area.
Source: Okinawa Prefecture
Northern area
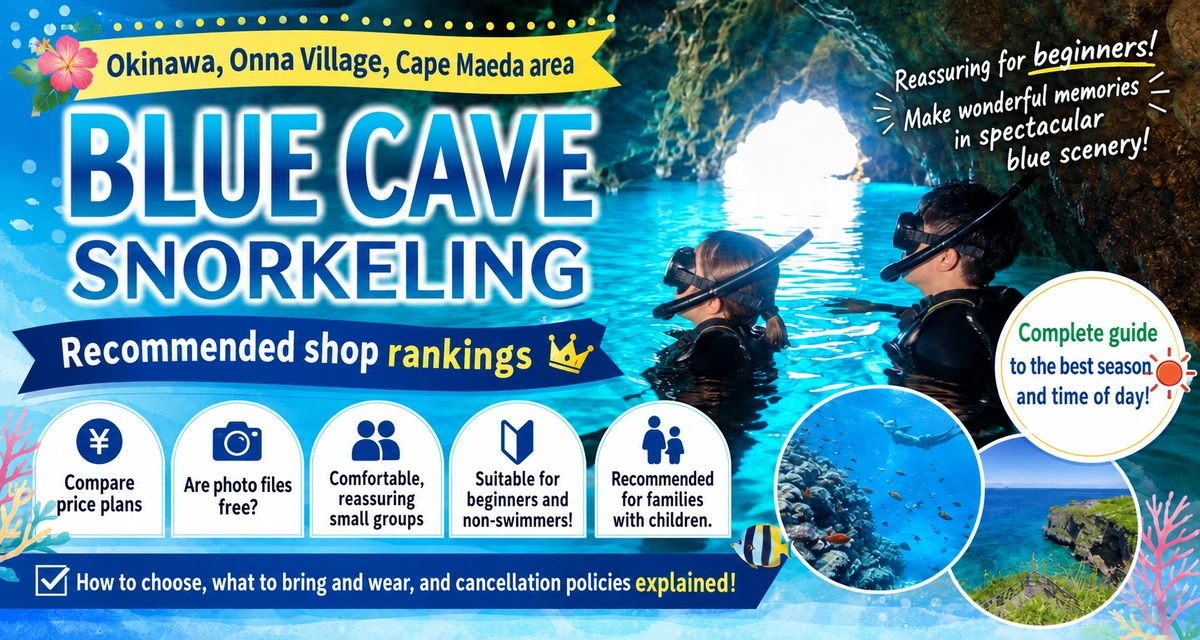
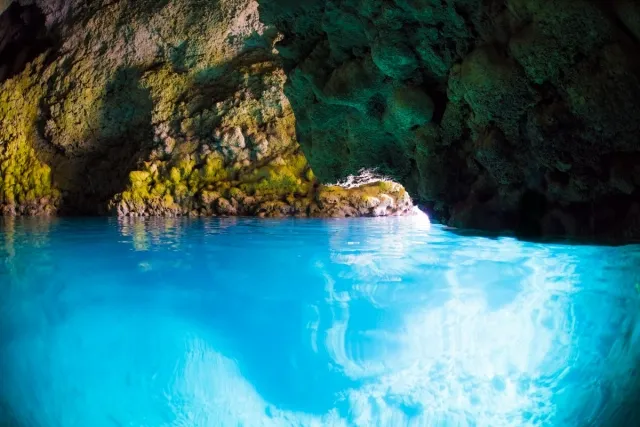
- Blue Cave (Cape Maeda)
Okinawa's main island's most popular snorkeling spot, where sunlight entering the cave creates a mysterious blue glow on the water. You can encounter many tropical fish and experience a magical underwater world.
- Sesoko Beach
This beach on Sesoko Island has exceptionally clear water and gradually deepening shallows. Even people who struggle with swimming and beginners can enjoy it with peace of mind.
Bise Fukugi Tree Road and beach
A beach with a peaceful atmosphere and extensive shallows. Enjoy it together with a stroll along the fukugi tree-lined road.
- Sakimotobu Gorilla Chop
Located in Motobu Town, this spot is named for a uniquely shaped rock. Fish and coral are abundant, with beautiful scenery perfect for Instagram. Facilities are also well provided, allowing comfortable snorkeling.
Central area
- Miyagi Coast
This beach in Chatan Town is ideal for diving and snorkeling, with extensive colorful soft coral. Many fish welcome you immediately after entering the sea.
- Miyagi Island (Tonnaha Beach)
Relatively uncrowded, it allows leisurely snorkeling. You can observe abundant marine life, including clownfish living in anemones and schools of small fish 1.
- Ikei Island (Ikei Beach)
A beautiful beach accessible by car, appealing for its clear sea and abundant tropical fish. A family-friendly environment includes a safe swimming area with lifeguards always present.
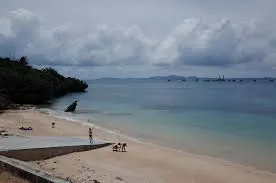
Southern area
- Odo Coast (John Man Beach)
- Located in Itoman City, it is known for visits by nesting sea turtles. Coral reefs appear offshore at low tide, allowing even beginners to snorkel with peace of mind. Visibility is high and abundant fish can be observed.
- It is popular as an ideal snorkeling spot. With luck, you may also see sea turtles up close.
- Naminoue Beach and Naminoue Umisora Park
The only beach spot in Naha, it has a dedicated snorkeling area. Its proximity to Naha Airport is a major attraction 1.
Kerama Islands
You can reach the Kerama Islands by ferry from Naha. There are many ideal spots for snorkeling in Okinawa's beautiful sea.
- Aharen Beach
Located on Tokashiki Island, it has clear water, colorful tropical fish, and beautiful coral reefs. Suitable for snorkeling beginners and popular with families.
- Furuzamami Beach
This beach on Zamami Island is known as an ideal snorkeling spot. Enjoy rich marine life and beautiful coral, with a particularly high chance of swimming with sea turtles.
- Tokashiki Beach
This beach on Tokashiki Island is famous for snorkeling with sea turtles. Its water is exceptionally clear, and snorkeling in the early morning is particularly recommended.
- Ama Beach
Located on Zamami Island, this beach is suitable for snorkeling and swimming. Chances of encountering sea turtles are high here too, and it is particularly popular with families.
All are surrounded by beautiful nature and let you experience the wonderful marine world through snorkeling. Choosing a beach with a particularly high sea turtle encounter rate can create a more special experience. Enjoy Okinawa's sea to the fullest!
Summary
- We explained in detail whether high or low tide is recommended for snorkeling, along with how both tides work.
About high and low tide
•High tide: the sea surface at its highest level
Low tide: the sea surface at its lowest level
High and low tide each occur 2 times in 1 day.
At low tide, water levels may reach 0cm in some places.
Using tide charts
Search by location online or in apps.
Check information ahead and enjoy snorkeling at the best time.
High and low tide recommendations for snorkeling
Beach entry at low tide is recommended for beginners and families. Shallow water brings you closer to fish for enjoyable participation with peace of mind.
Boat entry at high tide is recommended for experienced participants and people wanting to observe particular creatures. Open-sea locations in particular have diverse creatures, promising a more fulfilling experience.
- Joining a tour is recommended when snorkeling.
A professional guide provides careful support, allowing even beginners to participate with peace of mind.
10 tips for choosing a snorkeling tour company!
① Attention to safety
② Tour contents and purpose
③ Check reviews and feedback
④ Prices and service contents
⑤ Cancellation policy
⑥ Support for beginners
⑦ Quality of facilities and boats
⑧ Insurance availability
⑨ Entry method: beach entry or boat entry
➓ The tour company's principles and approach
- We introduced recommended snorkeling spots on Okinawa's main island.
Northern area
Blue Cave (Cape Maeda)
Sesoko Beach
Bise Fukugi Tree Road and beach
Sakimotobu Gorilla Chop
Central area
Miyagi Coast
Miyagi Island (Tonhana Beach)
Ikei Island (Ikei Beach)
Southern area
Odo Coast (John Man Beach)
Naminoue Beach and Naminoue Umisora Park
Kerama Islands
Aharen Beach
Furuzamami Beach
Tokashiki Beach
Ama Beach
Snorkeling is a wonderful activity that lets you directly experience the sea's beauty.
Knowing the timing of high and low tide is important for enjoying snorkeling.
Understanding tidal movements and preparing appropriately lets you enjoy a more fulfilling marine adventure. This is because tides change water depth and currents, affecting safety, visibility, and the creatures you can observe.
Respecting the natural environment and enjoying yourself within manageable limits is the secret to a more fulfilling snorkeling experience.
Fully appreciate the sea's appeal and make wonderful memories.